Manual
ES E-Logs is EquipmentShare's Electronic Logging Device (ELD) app for FMCSA Hours of Service (HOS) compliance. It automatically records your driving time, tracks your remaining hours, and generates the daily log required by federal law.
This app replaces paper log books. As long as you keep the app signed in and the vehicle paired, your driving time is recorded automatically. No manual entry is required during driving.
Example only
Example only
Use your EquipmentShare T3 account credentials to sign in. These are the same credentials you use for the T3 platform and other EquipmentShare apps.
-
1Download ES E-Logs from the Apple App Store or Google Play Store.
-
2Open the app and enter your T3 email address, then tap Continue.
-
3Enter your password and tap Sign In. You can also sign in with Google if your account is linked.
-
4If you have forgotten your password, tap Forgot password? to receive a reset link by email.
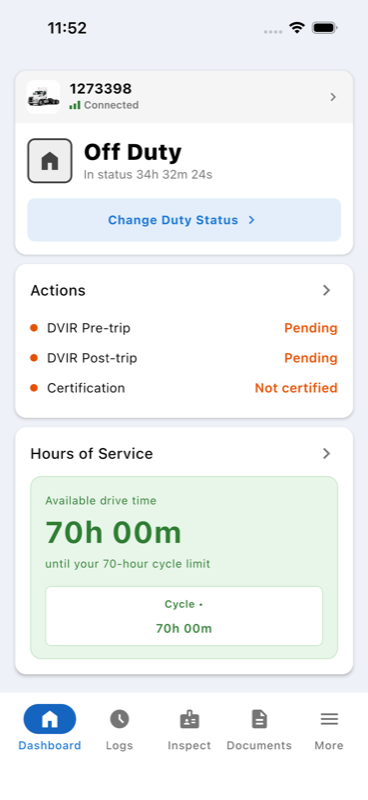
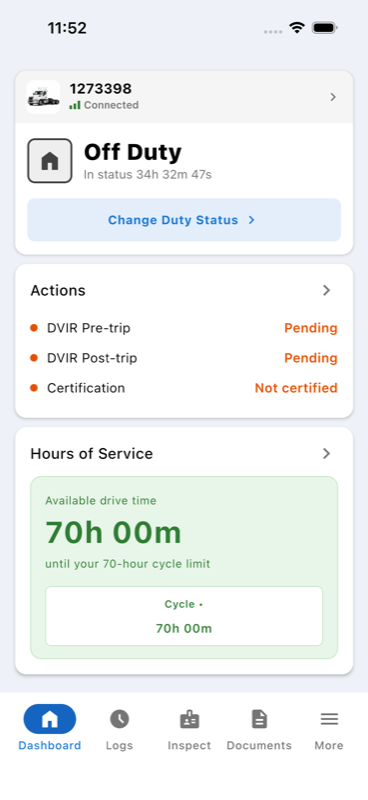
The Dashboard is the first screen you see after signing in. It shows everything you need at a glance for your shift.
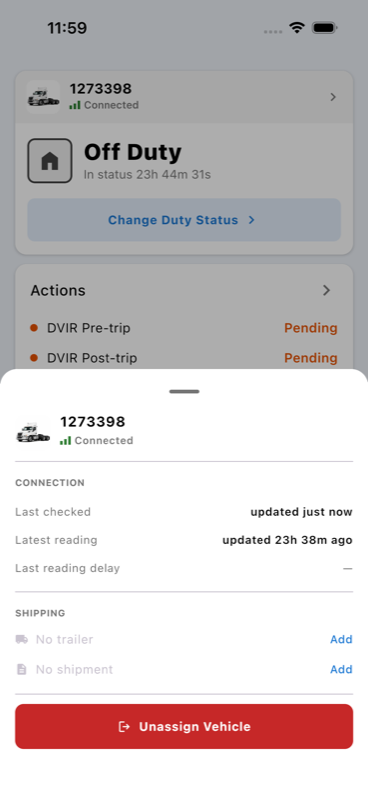
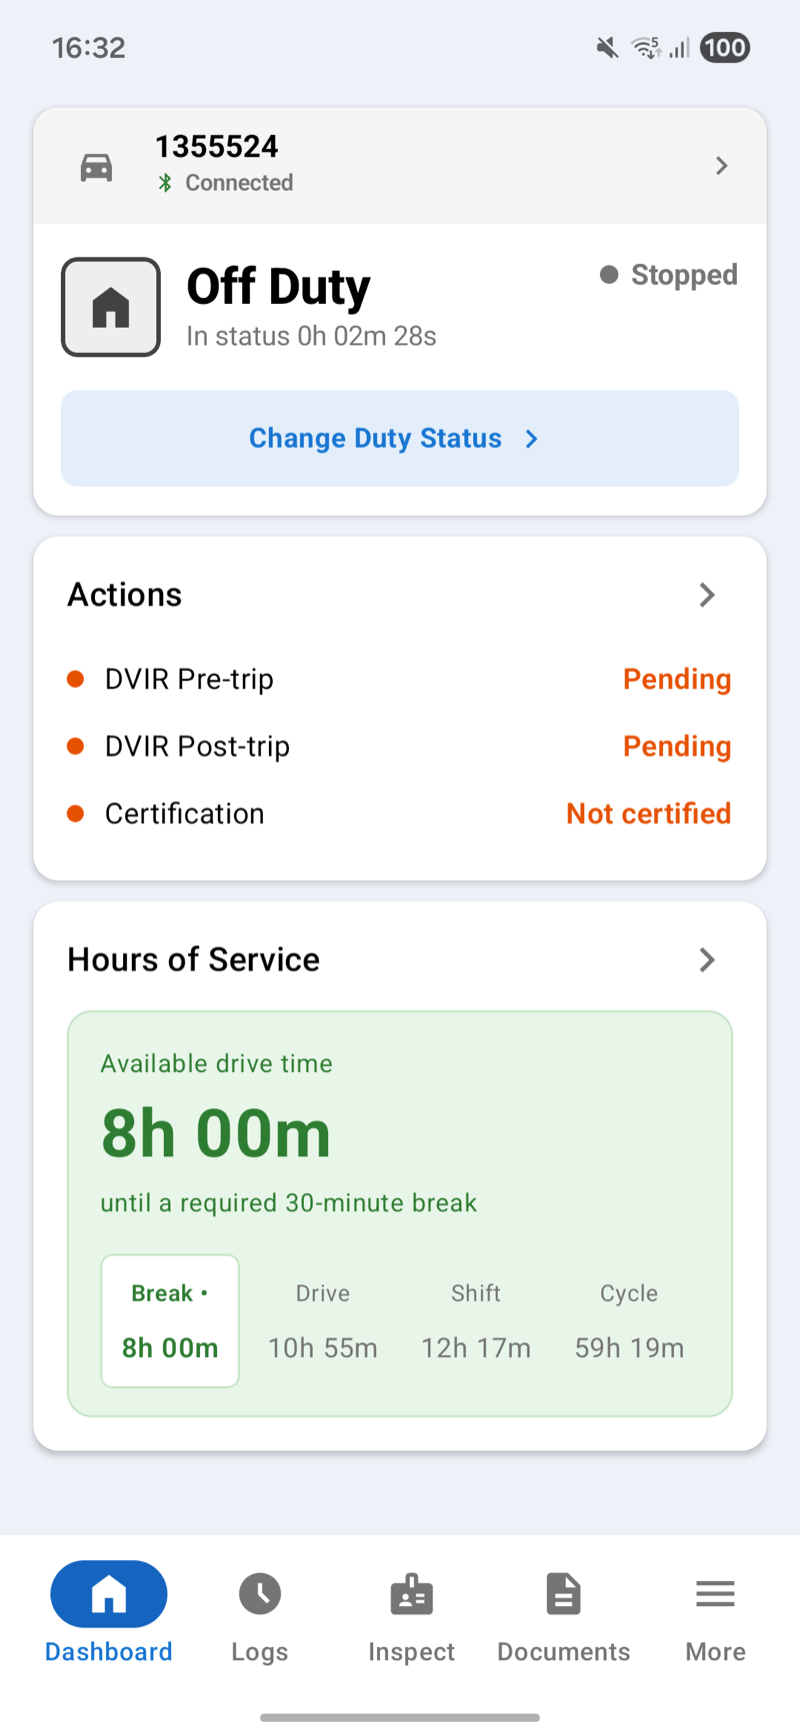
The top card shows your paired vehicle's unit number and connection status. When the signal icon is green, the mobile app has a connection to the tracker in use. Tap this card to view connection details or unassign the vehicle.
Your active duty status appears with a colored icon and how long you have been in that status. Tap Change Duty Status to switch statuses.
When the vehicle is moving at 5+ mph, the status automatically changes to Driving and the button is disabled until the vehicle stops.
The Actions card shows items that need your attention, including uncertified logs, pending DVIRs, and certifications. Tap the row or the arrow to open the full Actions screen for the current day.
The Hours of Service card summarises your four HOS timers at a glance. Each row shows remaining time alongside a progress bar that fills as time is used.
- Break
- Time until you must take a 30-minute break. Resets when you log 30+ consecutive minutes Off Duty or in the Sleeper Berth.
- Drive
- Driving hours used this shift (property-carrying limit: 11 h). Stops accumulating once you are off duty.
- Shift
- Total on-duty time since your last qualifying rest period (14-hour window for property-carrying operations).
- Cycle
- Cumulative on-duty hours over the rolling 7- or 8-day cycle (60 h / 70 h limit depending on your cycle rule).
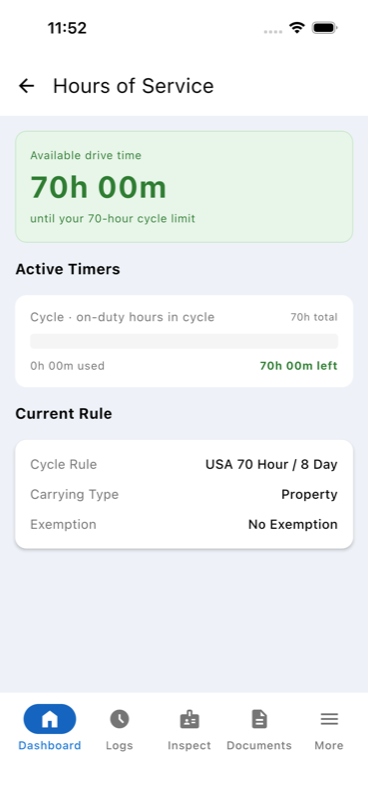
Tap the Hours of Service card to open the full HOS Details screen, where each timer is shown with its remaining, used, and total times.
You must pair with a vehicle before driving. The app connects to the ELD tracker installed in your vehicle, which automatically records speed, location, and engine data.
-
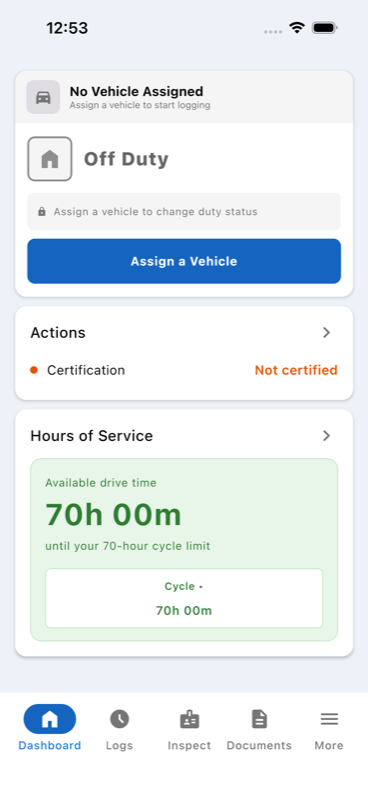
1From the Dashboard, tap Assign a Vehicle (shown when no vehicle is paired).
-
2Select your vehicle from Recently Assigned or use the search bar to find it by name.
-
3The vehicle card appears at the top of your Dashboard. A cellular tracker shows Connected right away. A Bluetooth tracker instead shows a Connect to Tracker button; see "Connecting a Bluetooth Tracker" below to finish pairing.
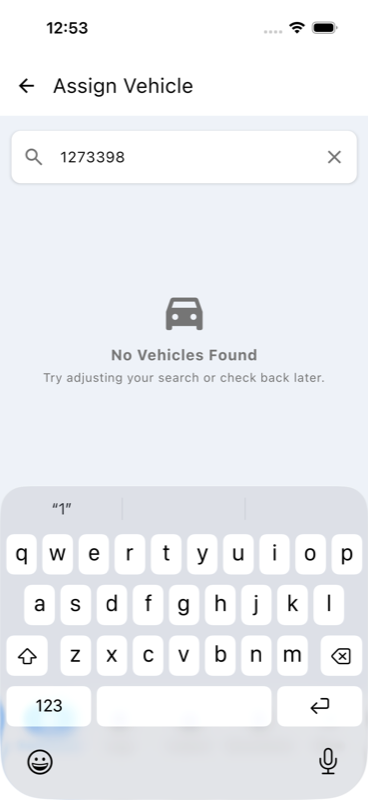
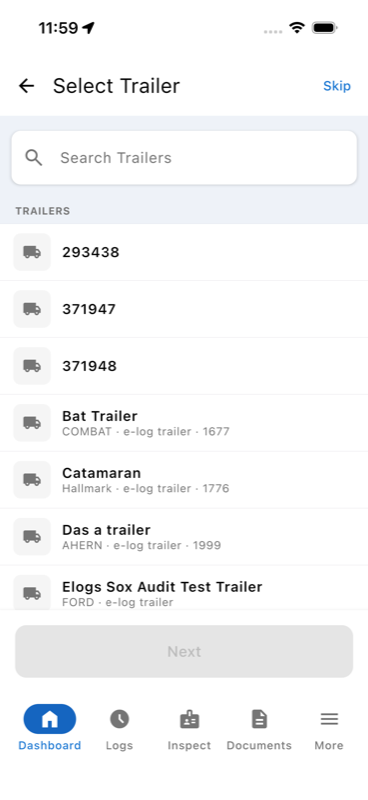
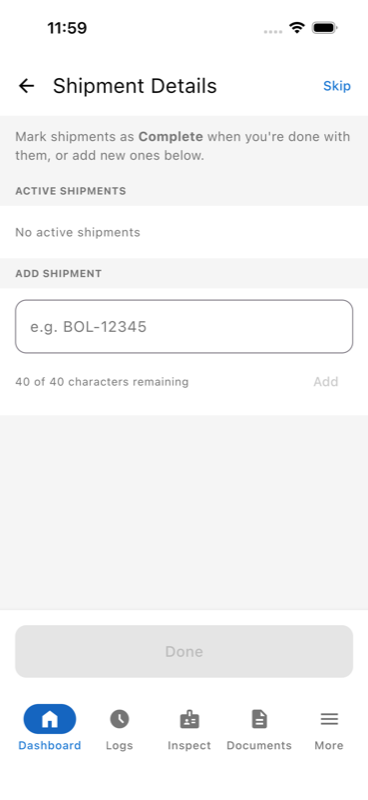
During pairing, assign a trailer and enter shipment information after selecting the vehicle. This information attaches to your daily log and is visible to your carrier. You can also tap the vehicle card on the Dashboard later to add or change trailer and shipment information at any time.
- Trailer Number
- Tap Add next to "No trailer" to select the trailer you are hauling from your fleet's trailer list. Tap Edit to change it when you switch trailers.
- Shipment Details
- Tap Add next to "No shipment" to enter a shipping document number. You can have multiple active shipments for multi-stop loads. Mark a shipment complete when you deliver.
-
1Tap your vehicle name on the Dashboard to open the vehicle sheet.
-
2Tap the red Unassign Vehicle button at the bottom of the sheet.
Your vehicle's ELD tracker communicates with the app in one of two ways, depending on which device is installed. Your fleet administrator determines which type is in each vehicle.
| Device | Communication Protocol |
|---|---|
| MCX101 | Cellular |
| MC4+ | Cellular |
| MC5 | Cellular |
| PT-40 | Bluetooth |
- Cellular tracker
- The tracker sends telemetry to the cloud over a cellular data connection. You pair the vehicle by selecting it from the vehicle list. No Bluetooth is required. The vehicle and your phone must both have an internet connection for the app to pull telemetry. Because data travels through a cellular network and server pipeline, there is an inherent processing delay. The vehicle detail sheet shows a Last reading delay value with a Typical badge when the delay is within the expected range.
- Bluetooth tracker
- The tracker communicates directly with your phone via Bluetooth Low Energy (BLE). You must be physically near the vehicle (within roughly 10 metres) to pair and maintain the connection. When connected, telemetry arrives in real time. BLE offers lower latency and no cellular dependency, but the connection is proximity-dependent.
- Last checked
- The last time your phone checked for telemetry.
- Last reading
- The last time your vehicle got a telemetry reading.
- Last reading delay
- The delay between the last processed event being generated and it being processed by your phone.
Once a vehicle with a Bluetooth tracker is assigned to you, its dashboard card shows a Connect to Tracker button. Tap it to start the BLE connection.
-
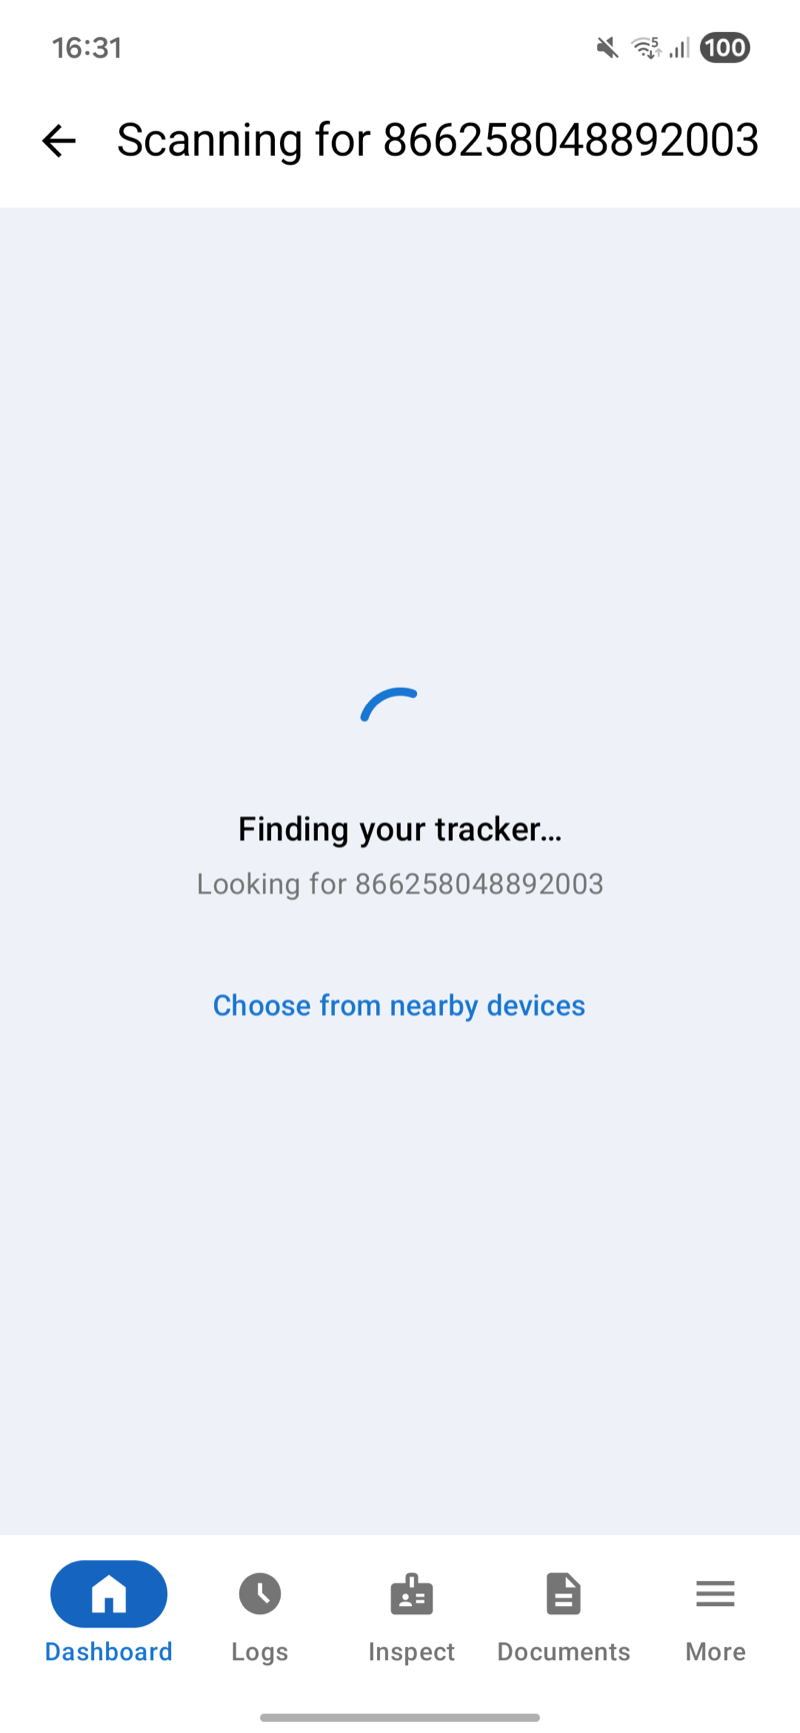
1Tap Connect to Tracker on the vehicle's dashboard card.
-
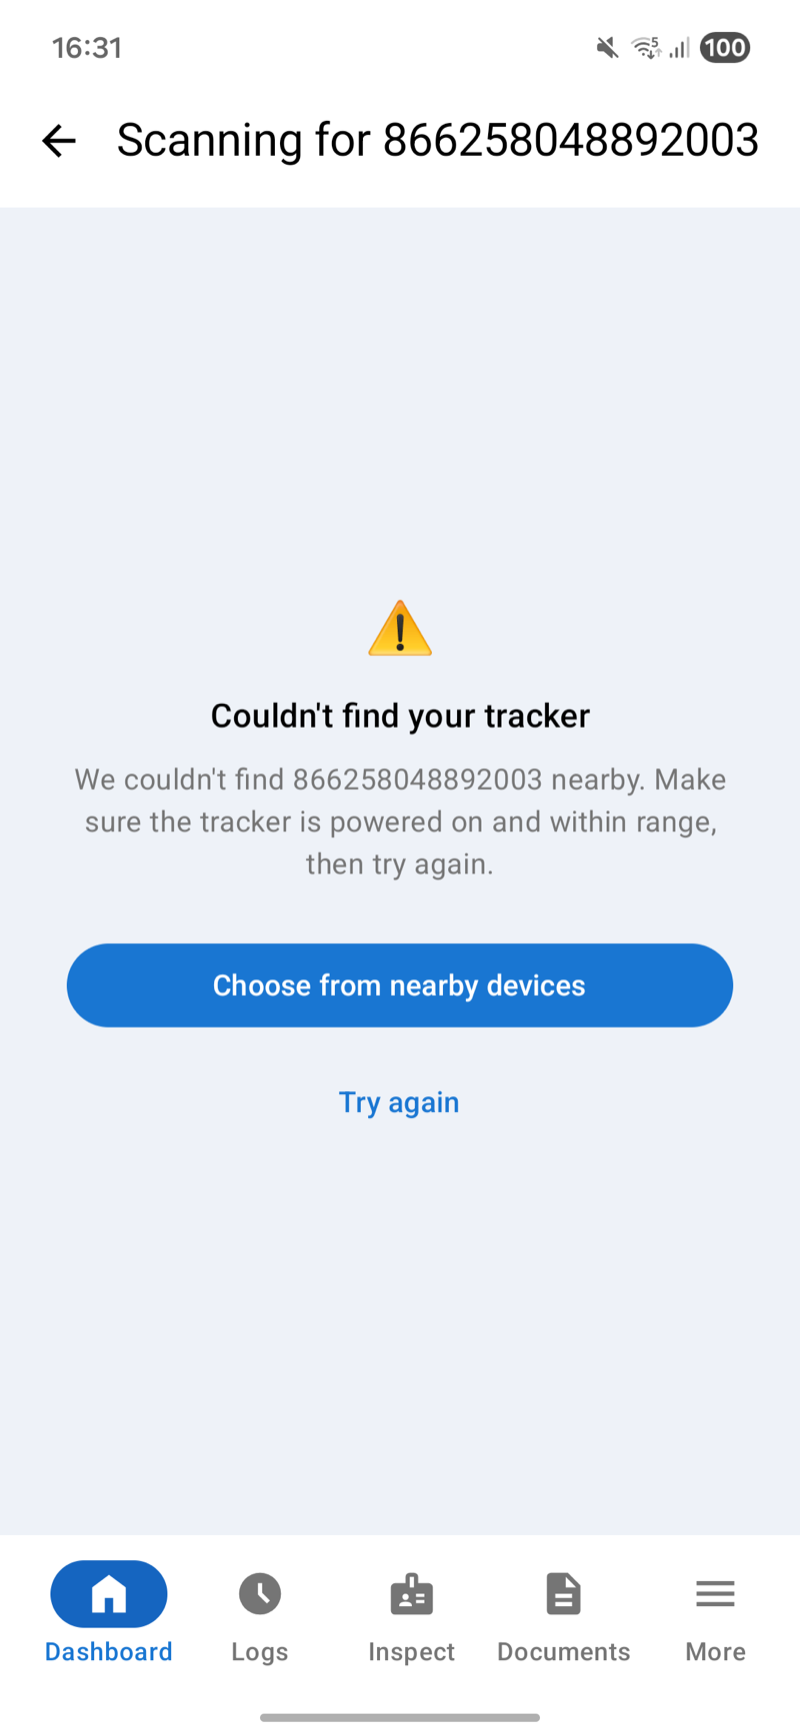
2The app automatically searches for your vehicle's tracker and connects. This can take up to 15 seconds.
-
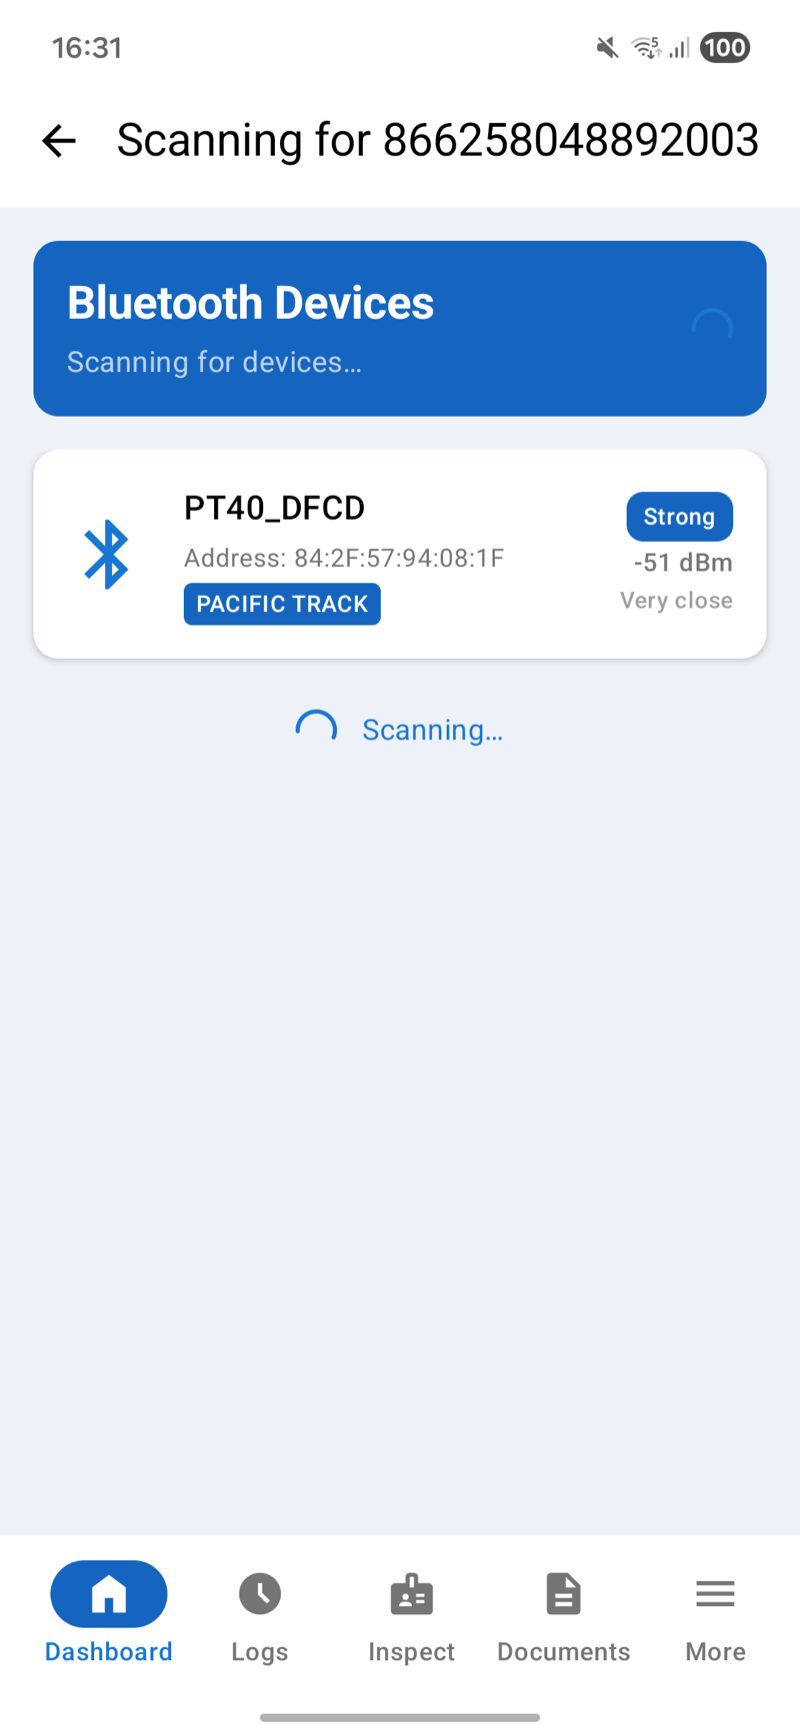
3If your tracker cannot be automatically connected to, you will be presented with the option to Choose from nearby devices. Select your Bluetooth tracker by name in the list presented.
-
4Once complete, the Dashboard shows your vehicle with a Bluetooth icon and a Connected status.
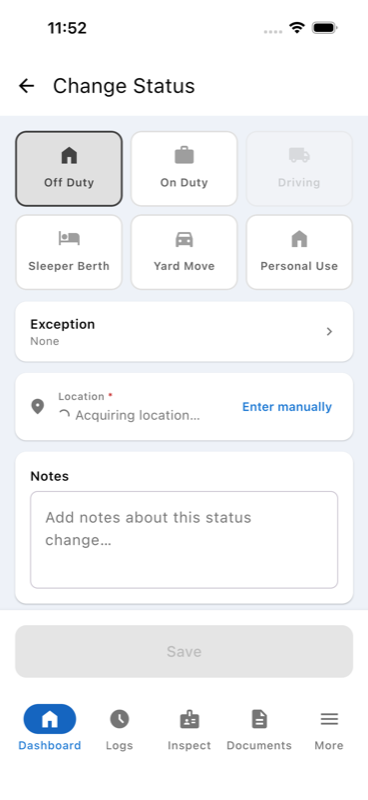
Tap Change Duty Status on the Dashboard to open the status selector. Select the appropriate status, then tap Save.
Yard Move and Personal Use are special indication modes. In both, driving time accumulation is suppressed. Movement does not count toward your HOS driving limits.
- YM Yard Move
- Recorded internally as On Duty (Not Driving). On-duty time continues to accrue normally. Use only for low-speed movement inside a terminal or yard, not for travel on public roads.
- PU Personal Use
- Recorded internally as Off Duty. Neither driving time nor on-duty time accrues. When the engine is turned off and back on while you are in Personal Use, the app prompts you to confirm whether you are continuing personal use or returning to work.
Tap Exception to claim a regulatory exception for this status change. Two exceptions are available:
- Adverse Driving Conditions
- Extends your allowed driving window by up to 2 hours when unexpected weather, road, or traffic conditions force you to remain on the road past your normal limit. Must be claimed at the time the conditions are encountered.
- Emergency Conditions
- Applies during an active government-declared emergency. Suspends certain HOS regulations for affected drivers for the duration of the declaration. Verify with your carrier before use.
Location is captured automatically from GPS. If GPS is unavailable, tap Enter manually and type your current city and state.
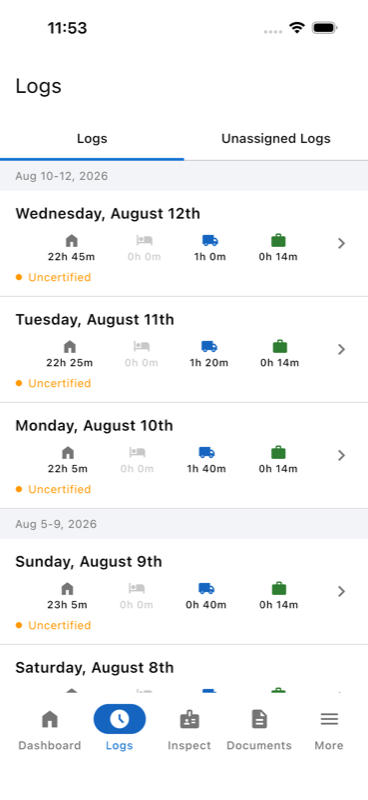
Tap Logs in the bottom tab bar to view your log history. Each row represents one day, showing a summary of time in each duty status.
The four icons on each log row represent (left to right): Off Duty time, Sleeper Berth time, Driving time, and On Duty time. The hours shown are your totals for that day.
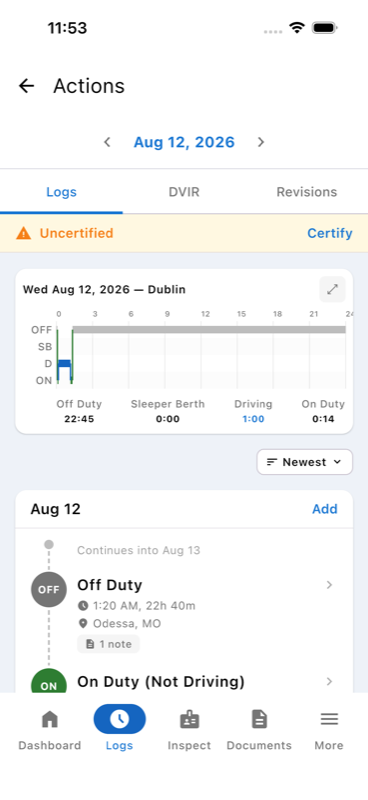
Tap any day to open the detail view. The 24-hour chart at the top shows your duty status changes graphically. The timeline below lists each individual status event with time, location, and source.
- Claimed
- An auto-detected event you have accepted as belonging to your log.
- Auto-detected
- Automatically recorded by the ELD based on vehicle motion data.
- Edited
- Manually entered or revised by the driver. Edited entries show a Revised badge.
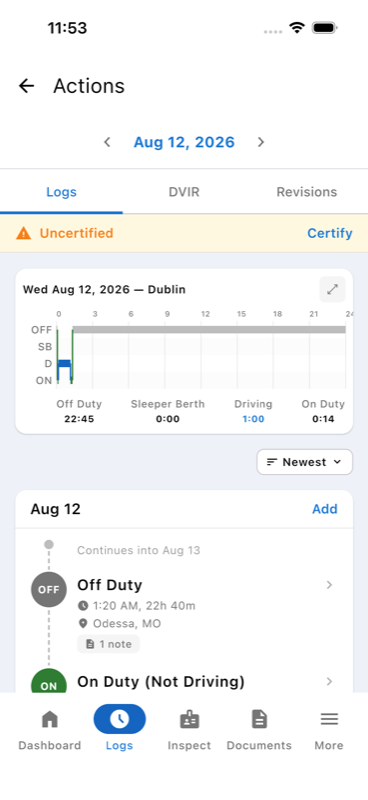
-
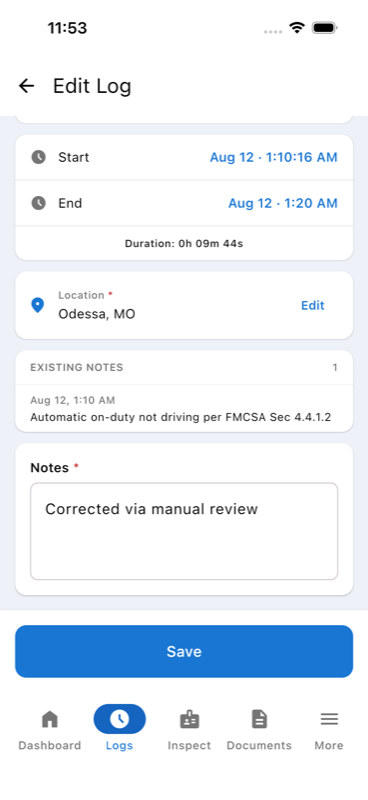
1From the log detail, tap Edit next to any eligible entry.
-
2Adjust the duty status, time, or location, and add a note explaining the reason for the change. A note is required.
-
3Tap Save to apply the revision. The entry is marked with a Revised badge.
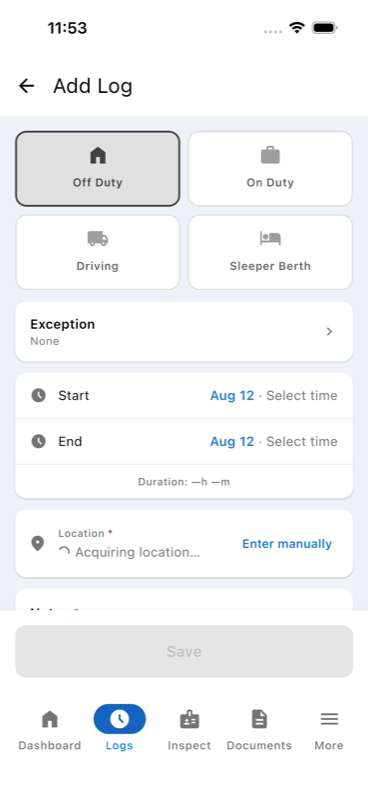
Tap the Add button in the log detail to insert a new duty status entry for that day. Enter the status, start time, end time, and location.
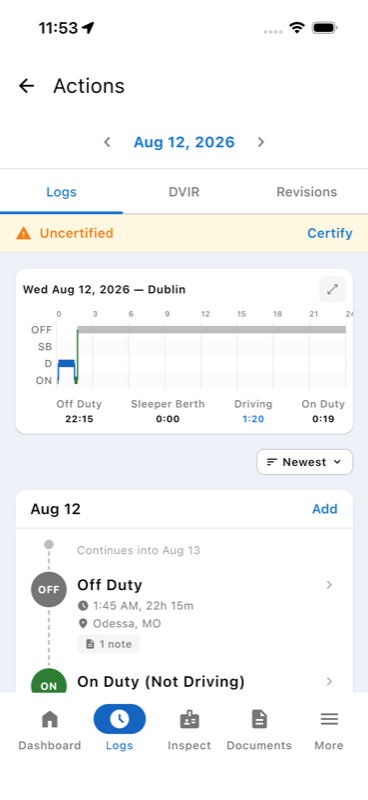
Certifying your daily log is the electronic equivalent of signing a paper log book. By certifying, you attest that your log is accurate and complete.
Certify each day's log at the end of your shift, after you have made any needed corrections. You will see an Uncertified or Recertification required banner at the top of the log detail.
-
1Open the Logs tab and tap the day you wish to certify.
-
2Review your log entries for accuracy. Make any necessary edits first.
-
3Tap the Certify button in the yellow banner at the top of the log.
-
4Read and accept the certification statement to confirm the log is accurate.
If changes are made to a previously certified log (for example, your administrator you edit your logs), you will be prompted to recertify. The banner changes to Recertification required and must be resolved.
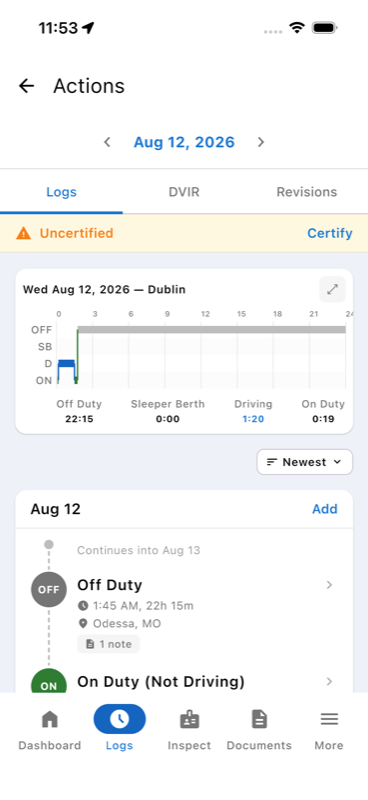
When the vehicle moves without a driver assigned to the asset, the ELD records the trip as an unassigned driving event. These events appear in the Unassigned Logs tab so the appropriate driver can claim them.
-
1Tap Logs in the bottom tab bar.
-
2Tap Unassigned Logs at the top of the screen.
-
3The default filter shows Pending entries, which need a decision. Each row shows the date, time range, and duration of the unassigned driving period.
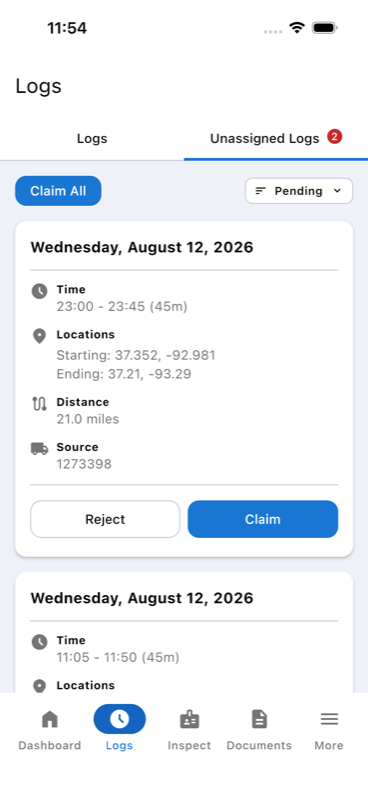
Each pending entry has two action buttons:
- Claim
- Assigns the unassigned driving period to your account. The event is added to your daily log for that day and counts toward your HOS totals.
- Reject
- Marks the event as not belonging to you. The entry moves to the Rejected filter view. Rejected logs can be re-claimed later if needed.
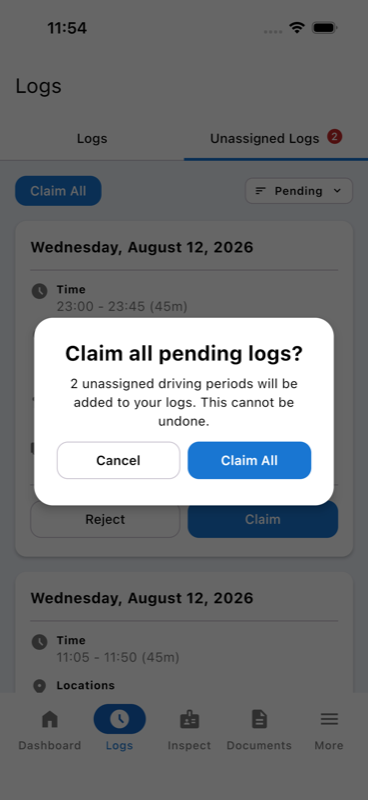
Tap Claim All in the top-right corner to claim every pending unassigned log in a single action. A confirmation dialog appears before any changes are made.
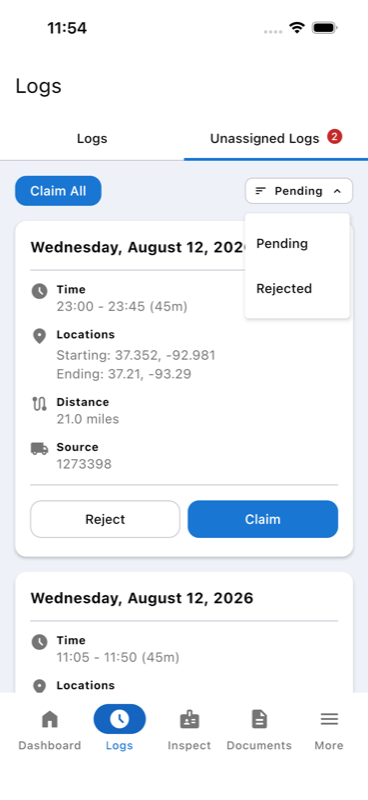
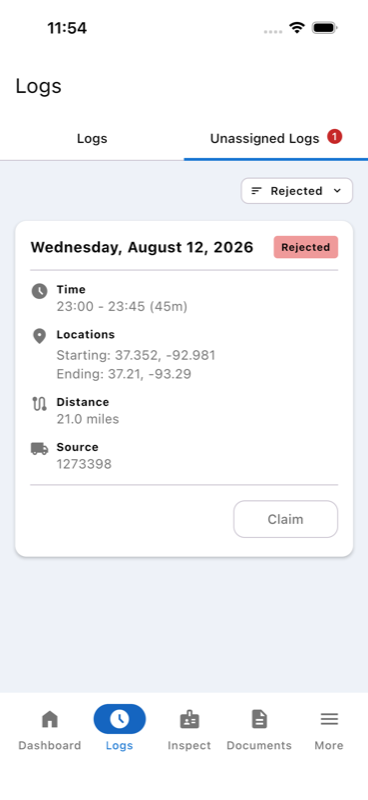
A filter control in the top-right of the Unassigned Logs screen lets you switch between views:
- Pending
- Shows unassigned events that have not yet been actioned. This is the default view.
- Rejected
- Shows events you have previously rejected. Rejected logs remain visible here and can be re-claimed if your decision changes. Tap Claim on any rejected entry to reassign it to your account.
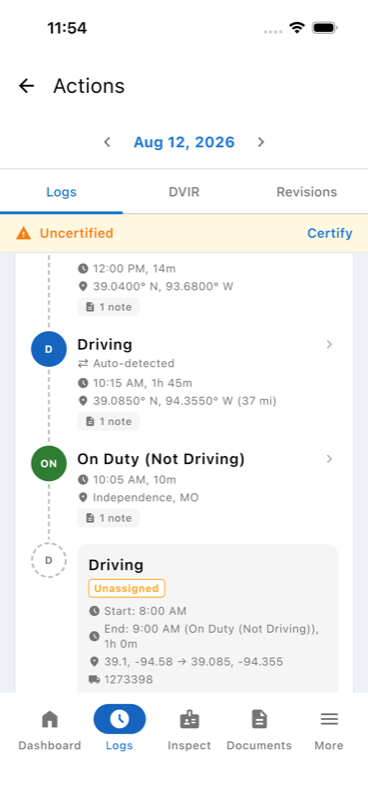
Unassigned driving periods are also surfaced inline in your daily log timeline.
Open any daily log (Logs → tap a day) and scroll the timeline. Unassigned periods appear as distinct entries labelled Unassigned with Claim and Reject buttons directly on the row.
After tapping Claim, the row updates to show a green Claimed badge, confirming the period has been added to your record.
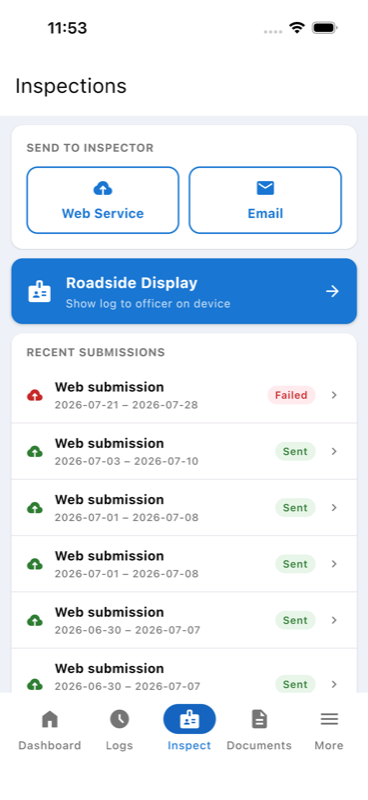
During a DOT roadside inspection, an officer may request your electronic logs. Tap the Inspect tab to choose how to provide them.
-
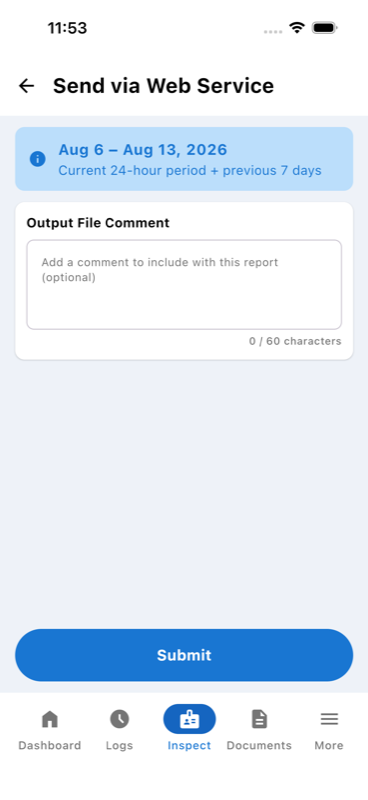
1Tap Web Service or Email. Web Service is preferred. Use Email only if Web Service is unavailable.
-
2Enter the Output File Comment if provided by the officer.
-
3Tap Submit. Your logs are sent wirelessly to the FMCSA inspection system.
Tap Roadside Display to show your logs directly on the device screen. No internet connection is required. Hand the device to the officer; they can scroll through your 24-hour chart and full event list.
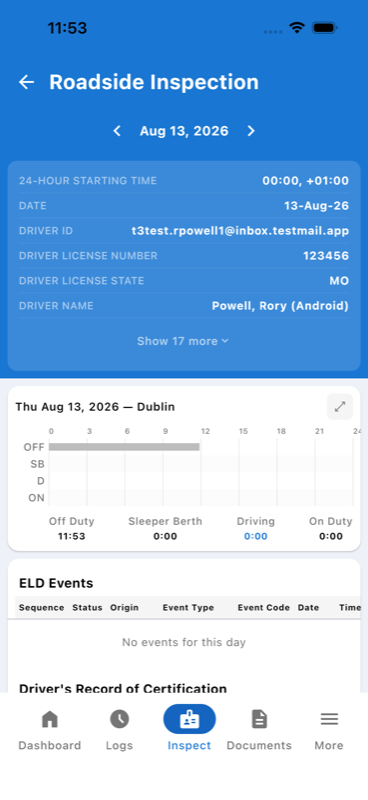
The ELD continuously monitors itself for technical issues. When a problem is detected, the app displays an alert card at the top of the Dashboard and logs an event in your record. Federal regulations require that you and your carrier are notified promptly.
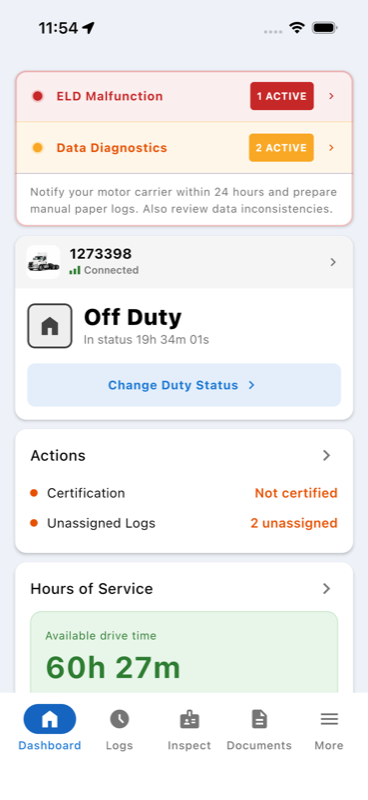
Tap the ELD Malfunction row on the Dashboard to see which malfunction is active and the exact actions required by federal regulation.
- Data Recording Compliance (R)
- Unable to record required log data. One or more entries may be incomplete.
- Power Compliance (P)
- Engine on/off events were not fully captured. Ensure Bluetooth is on and the tracker is powered.
- Positioning (L)
- GPS position unavailable. Enter location manually when changing duty status.
- Timing (T)
- ELD internal clock out of sync. Ensure the device has network access to sync time.
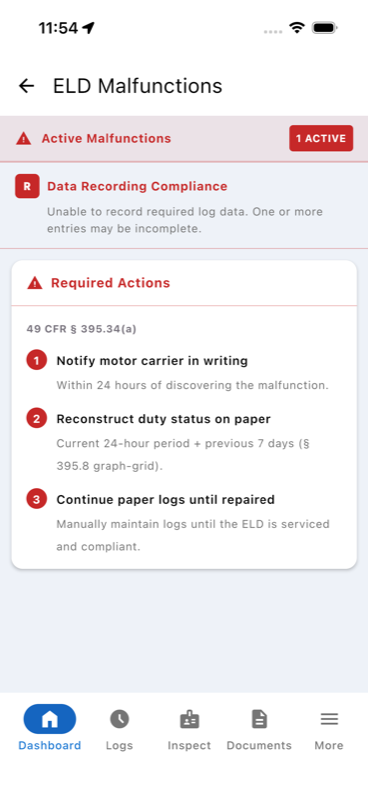
Tap Data Diagnostics to see active diagnostic codes. Diagnostics do not require paper logs but must be acknowledged and reported to your carrier.
- Unidentified Driving Records (Code 5)
- Driving detected with no driver logged in. Go to Logs → Unassigned Logs (Section 8) to review and claim or reject the records.
- Missing Required Data (Code 2)
- One or more required data fields are missing from a log event. Usually self-resolves on next sync.
-
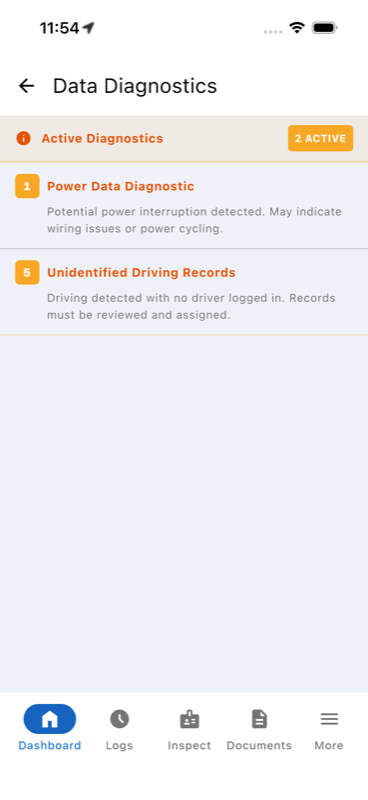
1Note the malfunction and notify your dispatcher or carrier within 24 hours.
-
2If the ELD cannot record data, revert to paper logs immediately. Carry paper log supplies in the cab at all times.
-
3Continue paper logs for up to 8 calendar days after the malfunction, or until the ELD is repaired, whichever comes first.
-
4At a roadside inspection, show the officer your paper logs for affected days. Note the malfunction in the remarks section.
-
5When the malfunction clears, resume using the ELD and reconstruct any missing data from your paper records.
A DVIR is the electronic equivalent of the paper pre- and post-trip inspection form required by FMCSA Part 396. Before and after each trip you must inspect your vehicle and report any defects. The app walks you through a step-by-step wizard to complete and certify each inspection.
-
1Open a DVIR from any of three places: a Pre-trip/Post-trip row on the Dashboard, the DVIR tab under Actions (tap Create New DVIR), or Start DVIR on the Inspect tab.
-
2If you didn't start from a Dashboard row, choose the inspection type: Pre-trip, Post-trip, General, or Incident.
-
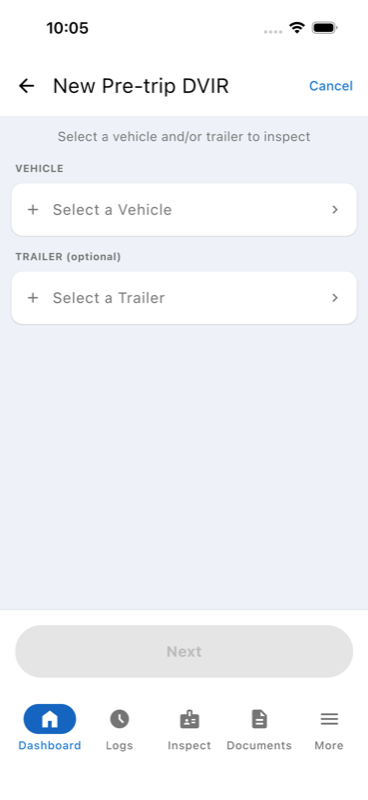
3Select the vehicle to inspect, and add a trailer if you're pulling one. Tap Inspect on an asset to begin its inspection.
-
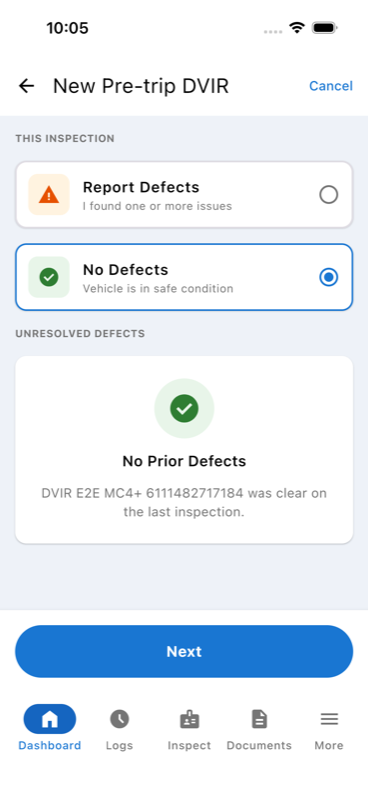
4For each asset, choose Report Defects if you found an issue, or No Defects if it's clear. Any unresolved defects from that asset's last inspection are listed here — tap one to review it before continuing.
-
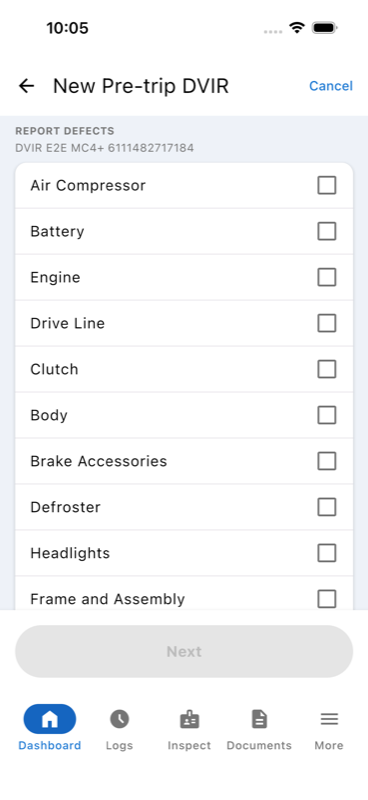
5If you're reporting defects, select every defect type that applies from your company's defect list.
-
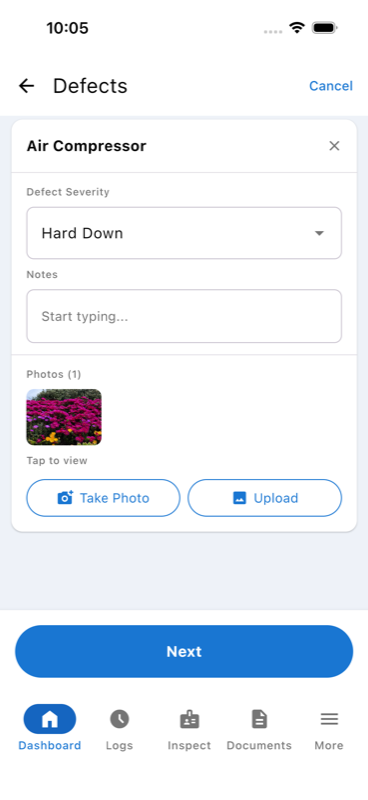
6For each defect, set its severity and take or upload a photo — a photo is required before you can continue. Notes are optional.
-
7Repeat for the trailer if you added one. You can't move on to certifying until every asset is marked complete.
-
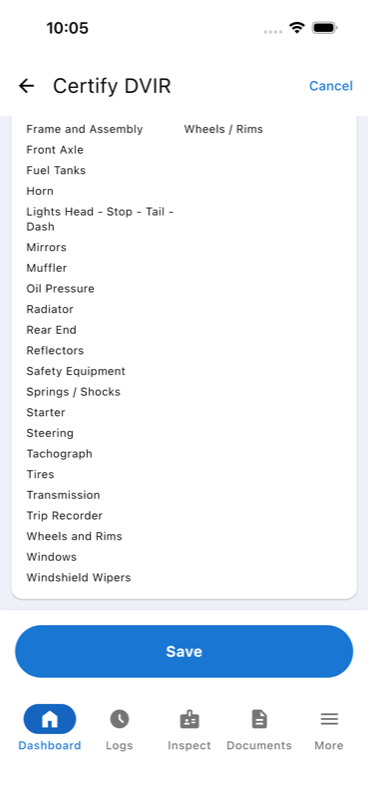
8Once every asset is complete, enter your name and check the certification box. If any defects were found, a second box appears confirming you've reviewed the defect categories — scroll through the table to the bottom to enable it.
-
9Tap Save to certify and submit the inspection.
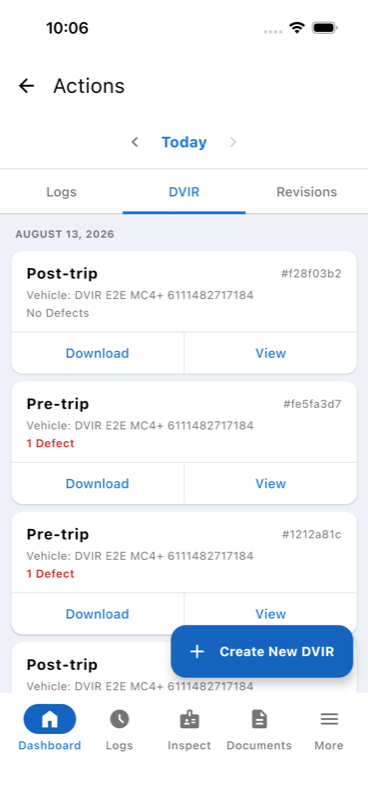
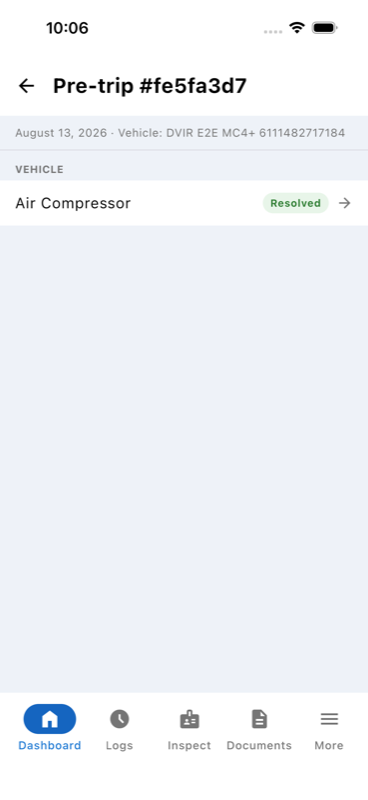
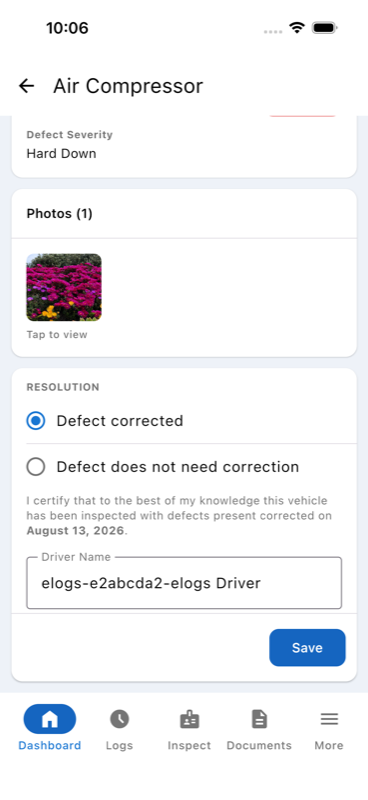
Completed DVIRs are listed under Actions → DVIR, and a completed Dashboard row also opens straight into it. Tap View to see the full report, or Download to generate a PDF. An unresolved defect can be resolved right from here — open it, mark it corrected or does not need correction, and save.
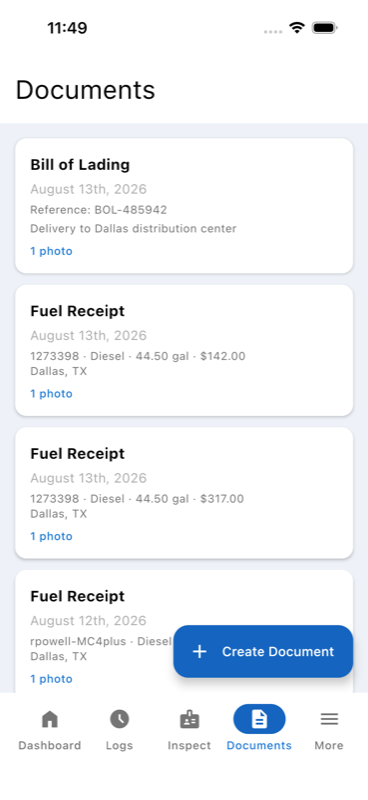
The Documents feature lets you capture and upload supporting records, such as fuel receipts, bills of lading, scale tickets, and more, directly from the app. Tap Documents in the bottom tab bar to open the document list.
-
1Tap Documents in the bottom tab bar.
-
2Tap Create Document.
-
3Choose a document type from the list.
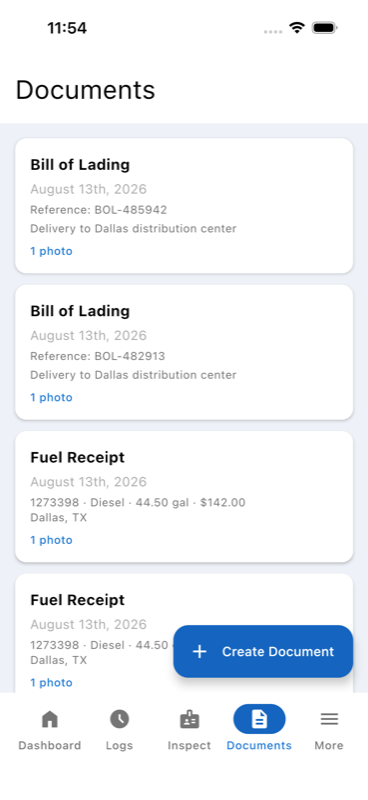
- Fuel Receipt
- Record fuel purchase with gallons, cost, and location.
- Bill of Lading
- Document for shipped goods and cargo details.
- Scale Ticket
- Weight measurement record for loads.
- Citation
- Traffic citation or violation record.
- Accident Photo
- Photo documentation of accident or incident.
- Other
- Any other supporting document not covered above.
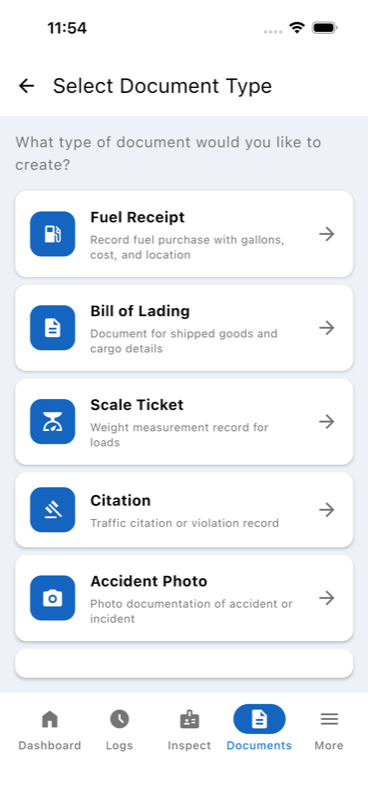
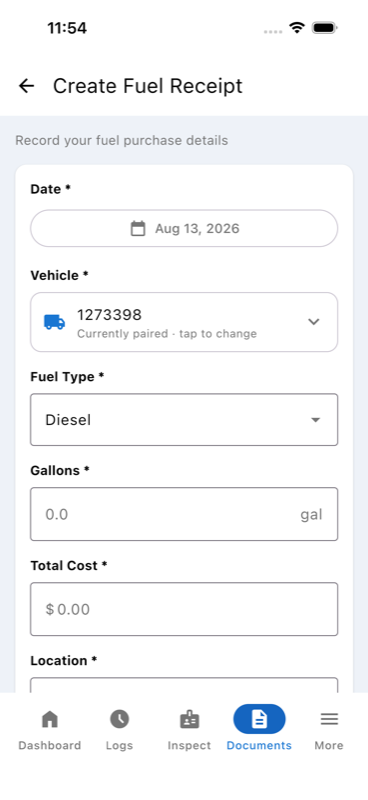
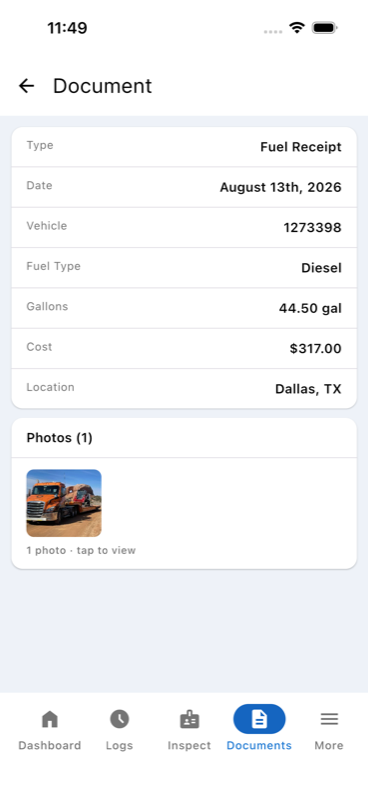
Date, Vehicle, Fuel Type, Gallons, Total Cost, and Location are required. Notes are optional. Attach at least one photo of the receipt, then tap Save Fuel Receipt.
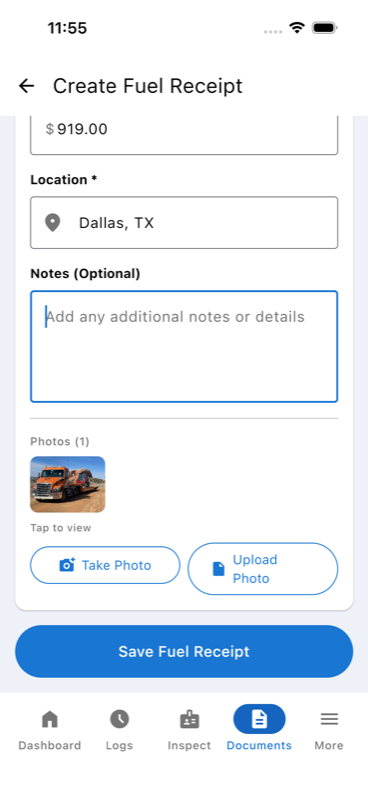
Saving returns you to the document list, where the new entry appears with a summary of its details. Tap any card to open its full detail view.
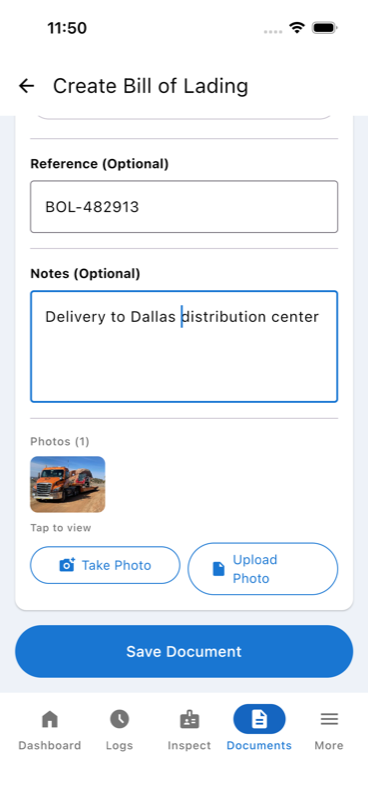
Bill of Lading, Scale Ticket, Citation, Accident Photo, and Other share a single form: Reference and Notes are both optional, and a photo is still required. The Save button reads Save Document for these types.
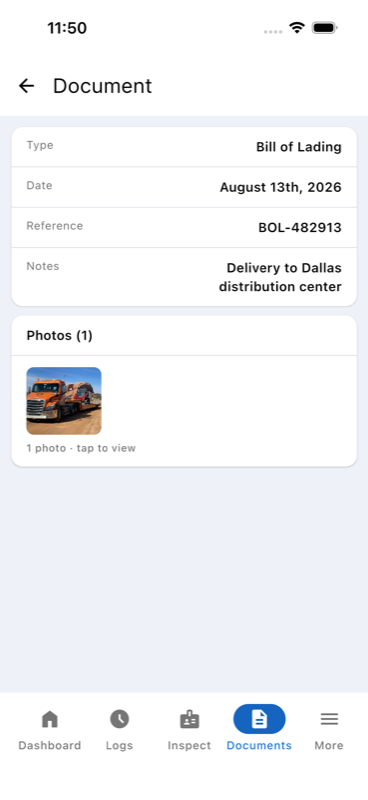
Tap any attached photo thumbnail — while filling out a form or in a document's detail view — to open it full-screen.
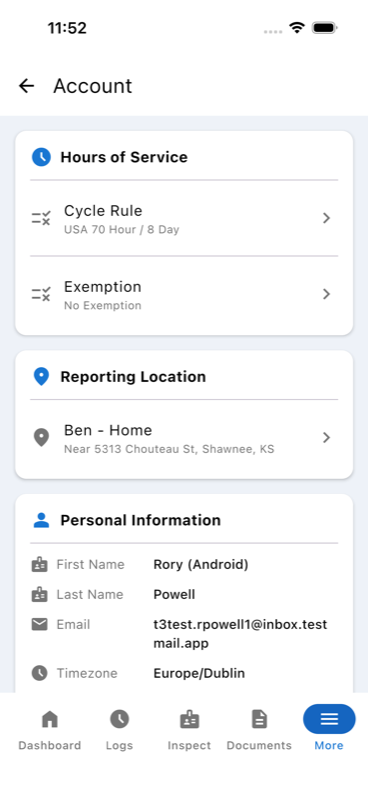
The Account screen (More → Account) centralises your driver profile and HOS configuration. Some fields are read-only (set by your carrier) while others can be changed by you directly in the app.
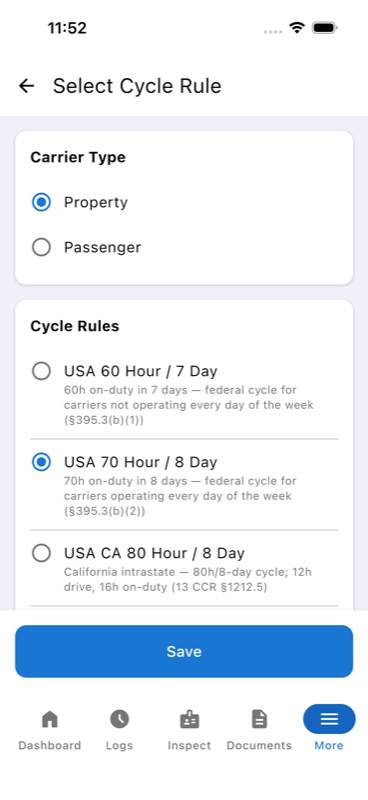
- Cycle Rule
- Your active HOS cycle: USA Property 70h/8d or USA Property 60h/7d. Tap to open a selection screen and choose the cycle that matches your operating mode.
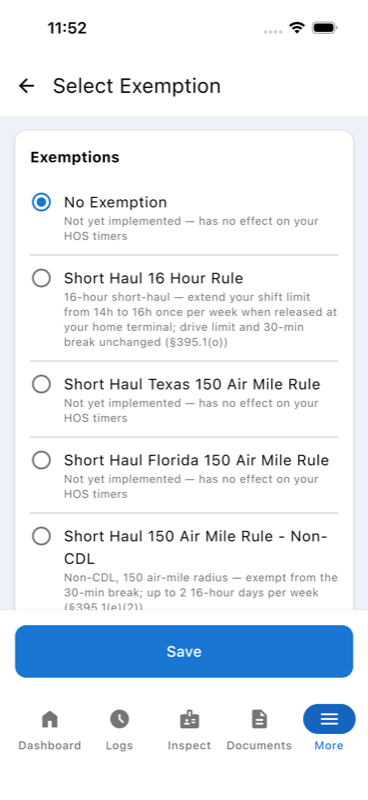
- Exemption
- Any active HOS exemption, such as Short Haul (100 air-mile radius) or No Exemption for standard operations. Tap to select from the available options for your account.
- Reporting Location
- The home terminal or location recorded on your log as your regular reporting point. Tap to select from the locations configured in your carrier's account.
- Personal Info
- Your name, email address, and timezone as registered with your carrier. Contact your fleet administrator to update these.
- License Info
- Your commercial driver's licence (CDL) number and issuing state. These are managed by your carrier and cannot be edited in the app.
Tap Cycle Rule or Exemption in the Account screen to open a selection list. The currently active option is highlighted. Tap a different option to apply it immediately. Your HOS timers on the Dashboard update to reflect the new limits.
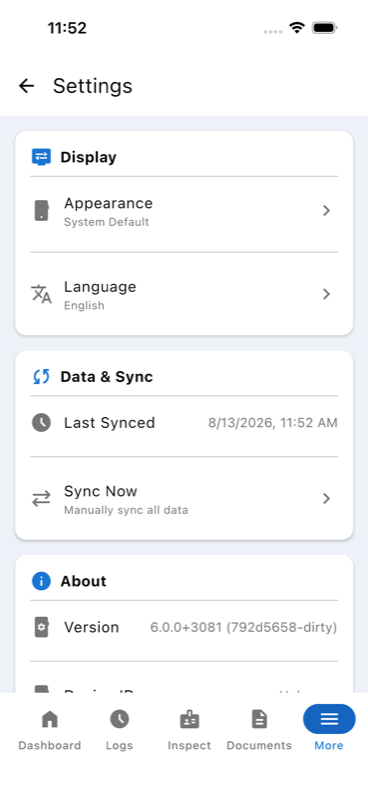
Tap More in the bottom tab bar to access app settings.
Change the app's Appearance between System Default, Light mode, or Dark mode.
Choose the language used for the app interface. English and Spanish are currently available.
The app syncs your log data automatically in the background. You can see when data was Last Synced and tap Sync Now to force an immediate sync if you suspect data is out of date.
The About section shows your app version number and device ID. Please have this information ready when contacting support.